Deploy a Custom Pytorch Model
📥 Step 1: Export your PyTorch model
In this tutorial, we’ll use a simple image classification model trained on the CIFAR-10 dataset. This example is implemented in PyTorch, but the same process works for any PyTorch model.
🚀 RECOMMENDED: Try our ready-made Colab notebook — run everything in your browser with zero hassle!
import torch.nn as nn
import torch.nn.functional as F

class SimpleCIFAR10Classifier(nn.Module):
    def __init__(self, num_classes=10):
        super(SimpleCIFAR10Classifier, self).__init__()
        self.conv1 = nn.Conv2d(3, 32, 3, padding=1)   # 3x32x32 -> 32x32x32
        self.conv2 = nn.Conv2d(32, 64, 3, padding=1)  # 32x32x32 -> 64x32x32
        self.pool = nn.MaxPool2d(2, 2)                # 64x32x32 -> 64x16x16
        self.fc1 = nn.Linear(16*16*64, 128)
        self.fc2 = nn.Linear(128, num_classes)

    def forward(self, x):
        x = F.relu(self.conv1(x))
        x = self.pool(F.relu(self.conv2(x)))
        x = x.view(x.size(0), -1)
        x = F.relu(self.fc1(x))
        x = self.fc2(x)
        return x
From this model definition, you can see that the input shape is [3, 32, 32] (standard CIFAR-10 images), and the output shape is [10] (number of classes).
You can confirm this by running some dummy data through the model and checking the output shape.
By default, PyTorch uses float32 (fp32) for both inputs and outputs, unless you explicitly change it (for example with mixed precision or quantization). Adjust this guide as needed for your specific settings.
✅ Load the trained model and prepare for export
Next, load your trained weights, move the model to the correct device (CPU or GPU), and set it to evaluation mode:
🔗 Download the model here: Download SimpleCIFAR10Model
device = torch.device('cuda' if torch.cuda.is_available() else 'cpu')
model = SimpleCIFAR10Classifier().to(device)
model.load_state_dict(torch.load(SAVE_PATH, map_location=torch.device('cpu')))
model.eval()  # Switch to inference mode
Calling model.eval():
-
disables dropout and batch normalization layers from updating their statistics, so they use the learned values from training,
-
ensures consistent outputs for inference.
🗂 Generate sample data
Before exporting, let’s also create some sample input and output data files.
This will help later when testing or deploying your model.
We’ll generate random data matching the expected shapes, and save them into a sample_data/ directory with filenames like 0_in.npy, 0_out.npy, ..., 9_in.npy, 9_out.npy.
import os
import numpy as np
import torch

# Ensure the directory exists
os.makedirs("sample_data", exist_ok=True)

# Generate 10 samples
for idx in range(10):
   # Input: random image tensor [1, 3, 32, 32]
   input_sample = np.random.randn(1, 3, 32, 32).astype(np.float32)

   # Get model output
   with torch.no_grad():
       input_tensor = torch.from_numpy(input_sample).to(device)
       output_tensor = model(input_tensor)
       output_sample = output_tensor.to("cpu").numpy()
       print(output_sample.shape)

   # Save input and output
   np.save(f"sample_data/{idx}_in.npy", input_sample)
   np.save(f"sample_data/{idx}_out.npy", output_sample)
✅ This ensures you have 10 pairs of sample input/output data files you can use for validation or to feed into your deployment platform.
📦 Export the model to ONNX
Now you can export your PyTorch model to the ONNX format.
Create a dummy input tensor that matches the expected input shape (with a batch dimension), and run torch.onnx.export:
dummy_input = torch.randn(1, 3, 32, 32).to(device)

# IMPORTANT: model name must be model.onnx during import
onnx_path = "exports/model.onnx"
torch.onnx.export(
   model,
   dummy_input,
   onnx_path,
   input_names=['input'],
   output_names=['output'],
   dynamic_axes={'input': {0: 'batch_size'}, 'output': {0: 'batch_size'}},  # Optional: allow variable batch sizes
   opset_version=11  # Recommended minimum for broad compatibility
)

print(f"Model exported to {onnx_path}")
-
The
dynamic_axesargument is optional but recommended if you want to support different batch sizes or variable sequence lengths. Modify it based on your specific model. -
By adding the extra batch dimension in the dummy input (
1, 3, 32, 32), you make sure your exported model is ready for batch inference.
This means your ONNX model’s input shape is now[batch_size, 3, 32, 32]and output shape is[batch_size, 10].
Be sure to remember your onnx_path ("model.onnx") — you’ll use it in the next steps.
🔍 (Optional) Final checks
If you’re unsure or just curious, you can verify your exported ONNX model.
For additional validation steps, follow this guide: Final checks
You can also programmatically inspect the input and output shapes and data types using the onnx Python API (None represents a dynamic axis):
import onnx
import onnx.mapping

model = onnx.load("model.onnx")
graph = model.graph

print("Inputs:")
for input_tensor in graph.input:
    name = input_tensor.name
    elem_type = input_tensor.type.tensor_type.elem_type
    shape = [d.dim_value if d.dim_value > 0 else "None" for d in input_tensor.type.tensor_type.shape.dim]
    print(f"  Name: {name}")
    print(f"  Type: {onnx.mapping.TENSOR_TYPE_TO_NP_TYPE[elem_type]}")
    print(f"  Shape: {shape}")

print("\nOutputs:")
for output_tensor in graph.output:
    name = output_tensor.name
    elem_type = output_tensor.type.tensor_type.elem_type
    shape = [d.dim_value if d.dim_value > 0 else "None" for d in output_tensor.type.tensor_type.shape.dim]
    print(f"  Name: {name}")
    print(f"  Type: {onnx.mapping.TENSOR_TYPE_TO_NP_TYPE[elem_type]}")
    print(f"  Shape: {shape}")
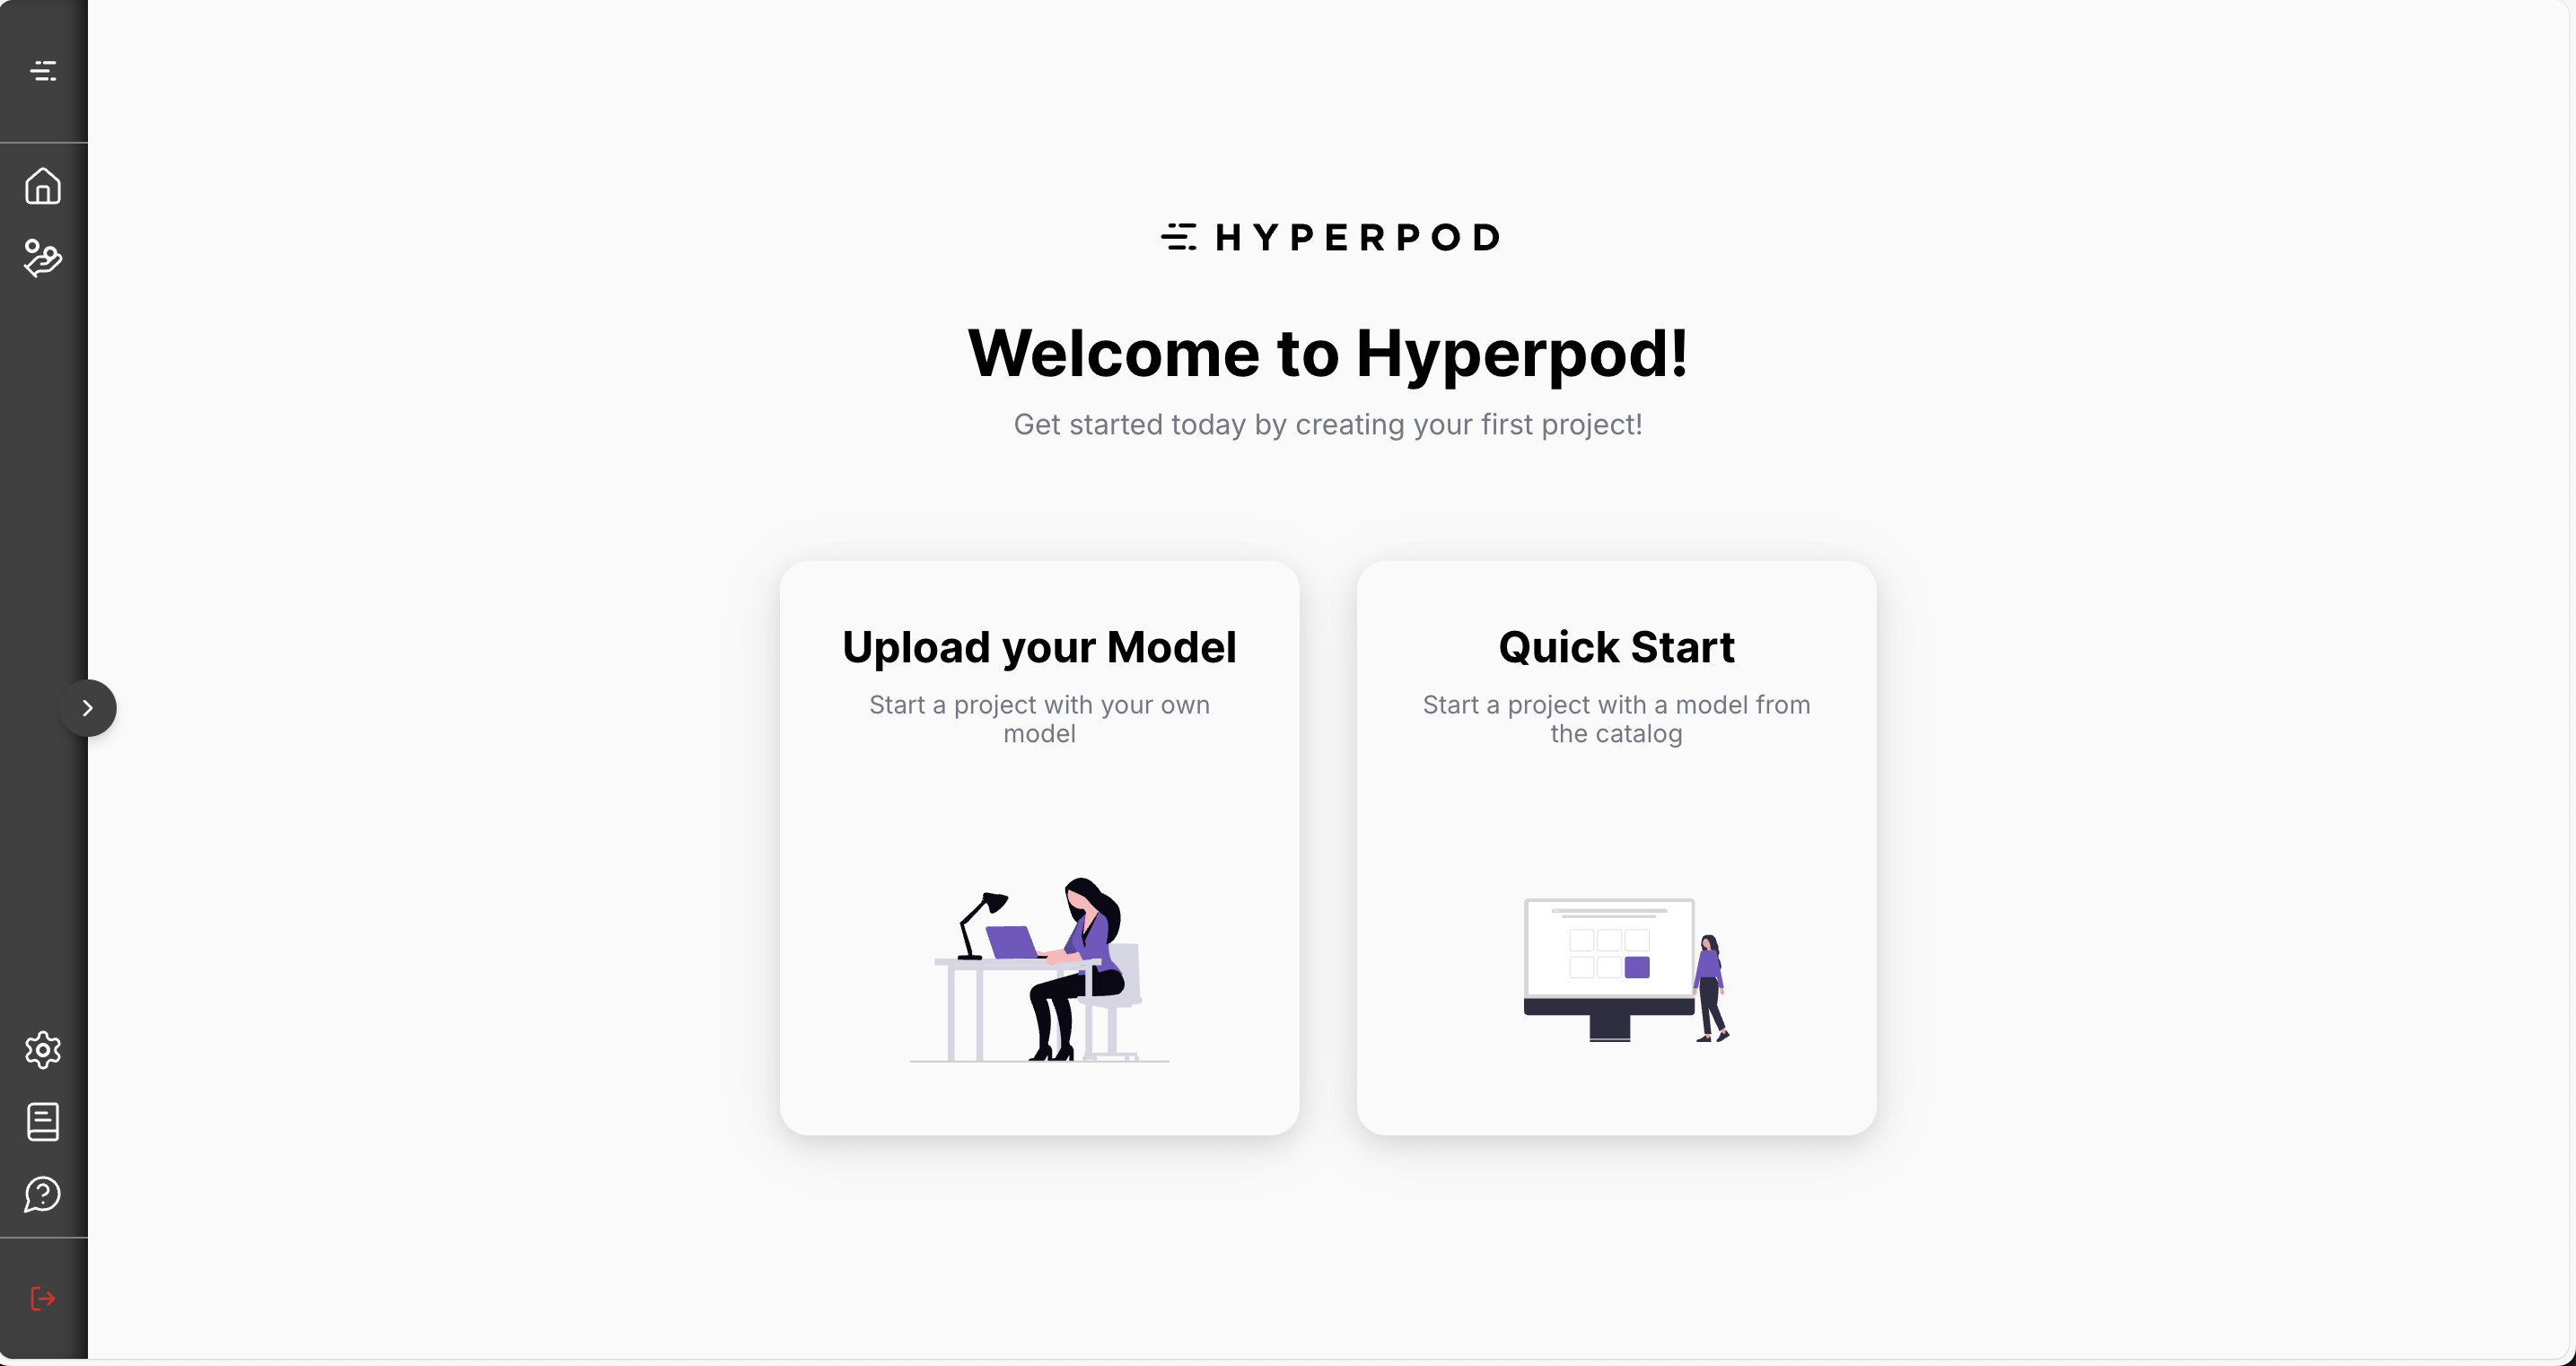
🔐 Step 2: Sign Up on Hyperpod AI
Head to app.hyperpodai.com
-
Create a free account (includes 10 free hours)
-
Click on “Upload your Model”
🛠️ Step 3: Set Up Your Project
Fill in the project form like so:
-
Project Name: (Any name — for your reference)
-
Upload Your Model: Upload the ONNX model file you just downloaded
-
Model Type: ONNX
-
Input Batch Size: -1
🔸 Batch size controls how many audio samples are processed at once. If your ONNX model doesn’t support batching, we recommend setting this to
-1— this tells the system to use a fixed batch size of 1, which helps reduce cost and speed up inference. Note that in this setup, negative values indicate a fixed batch size, while positive values allow dynamic batching up to the specified maximum. -
Input Shape:
3,32,32🔹 This means the model expects images with shape
[32, 32](channels-first RGB, 32×32), with a flexible batch dimension. -
Output Shape:
10🔹 The model outputs a vector of class scores of length
10(for CIFAR-10’s 10 categories).
🔹 The-1again corresponds to the batch size. -
Input Type: FP32
-
Output Type: FP32
🔹 By default, PyTorch (and your ONNX export) uses 32-bit floating point for both inputs and outputs.
🔹 To learn how to confirm the expected input and output types from your ONNX file, click here. -
Sample Data:
🔹 This allows the platform to automatically validate your model’s inputs and outputs, and helps optimize your deployment for faster inference and lower costs over time.
🔸 You can upload all the sample_data exported earlier
✅ Your Full setup should look like this:
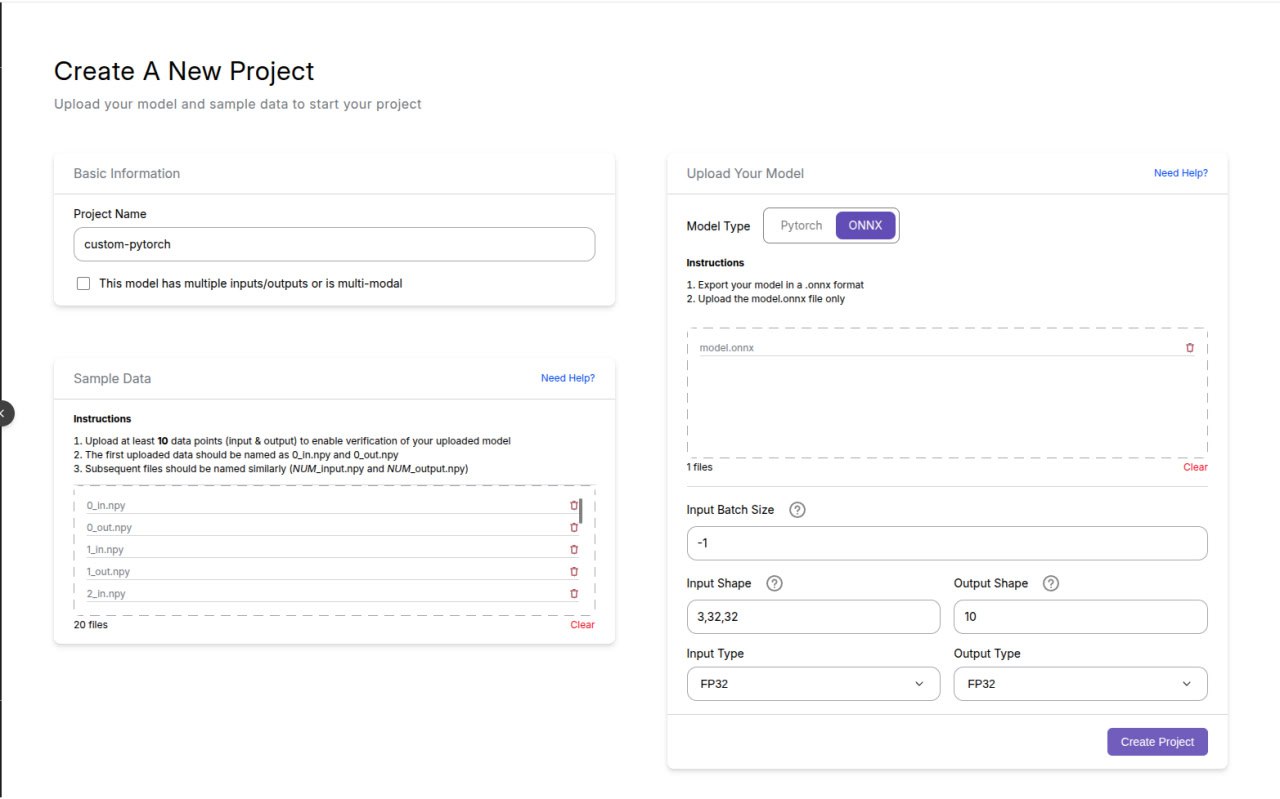
- Finally, Click Create Project. This may take a few minutes as Hyperpod sets up and optimizes the deployment for you automatically.
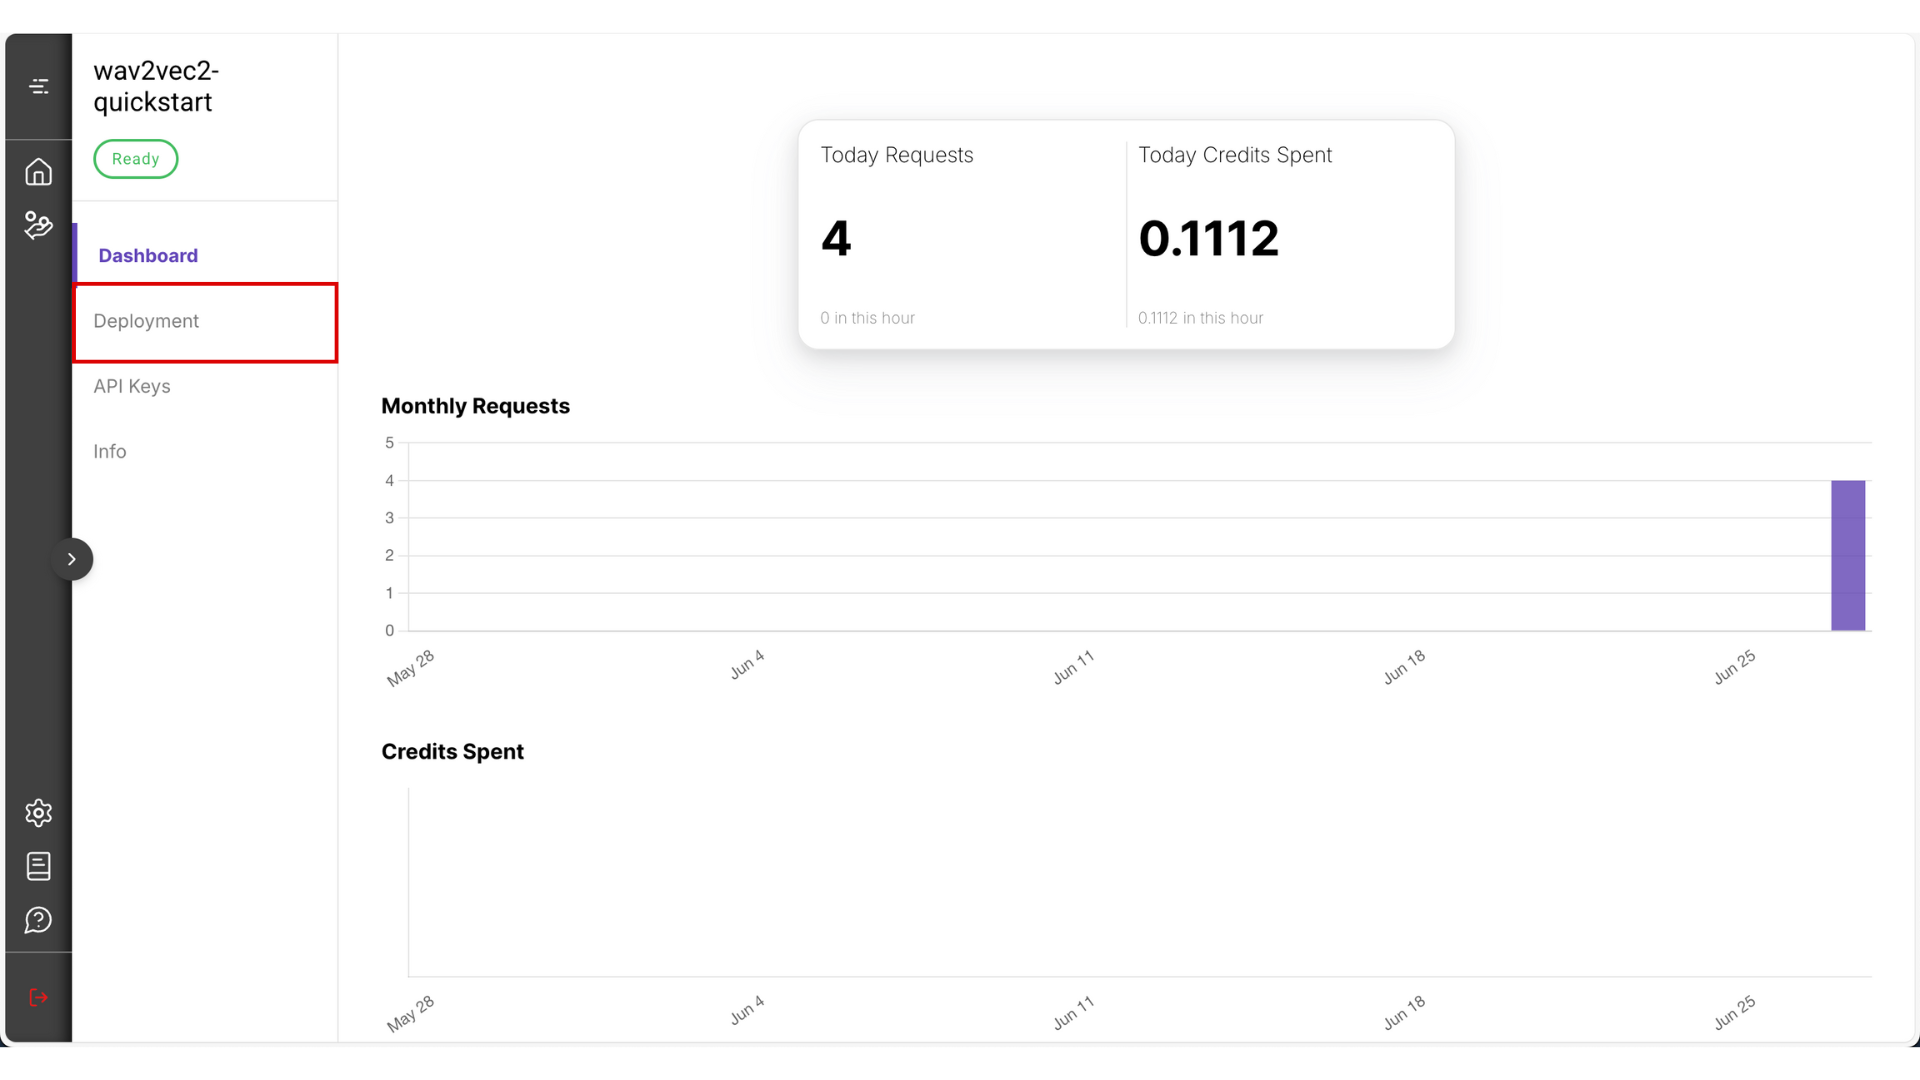
🔑 Step 4: Set up your API
- After the deployment is done it should look like something this

- Go to Deployment
- You can choose between Test mode and Production mode. For this guide, select Test mode — it’s the most cost-effective option. Read more about the difference between test and production mode.
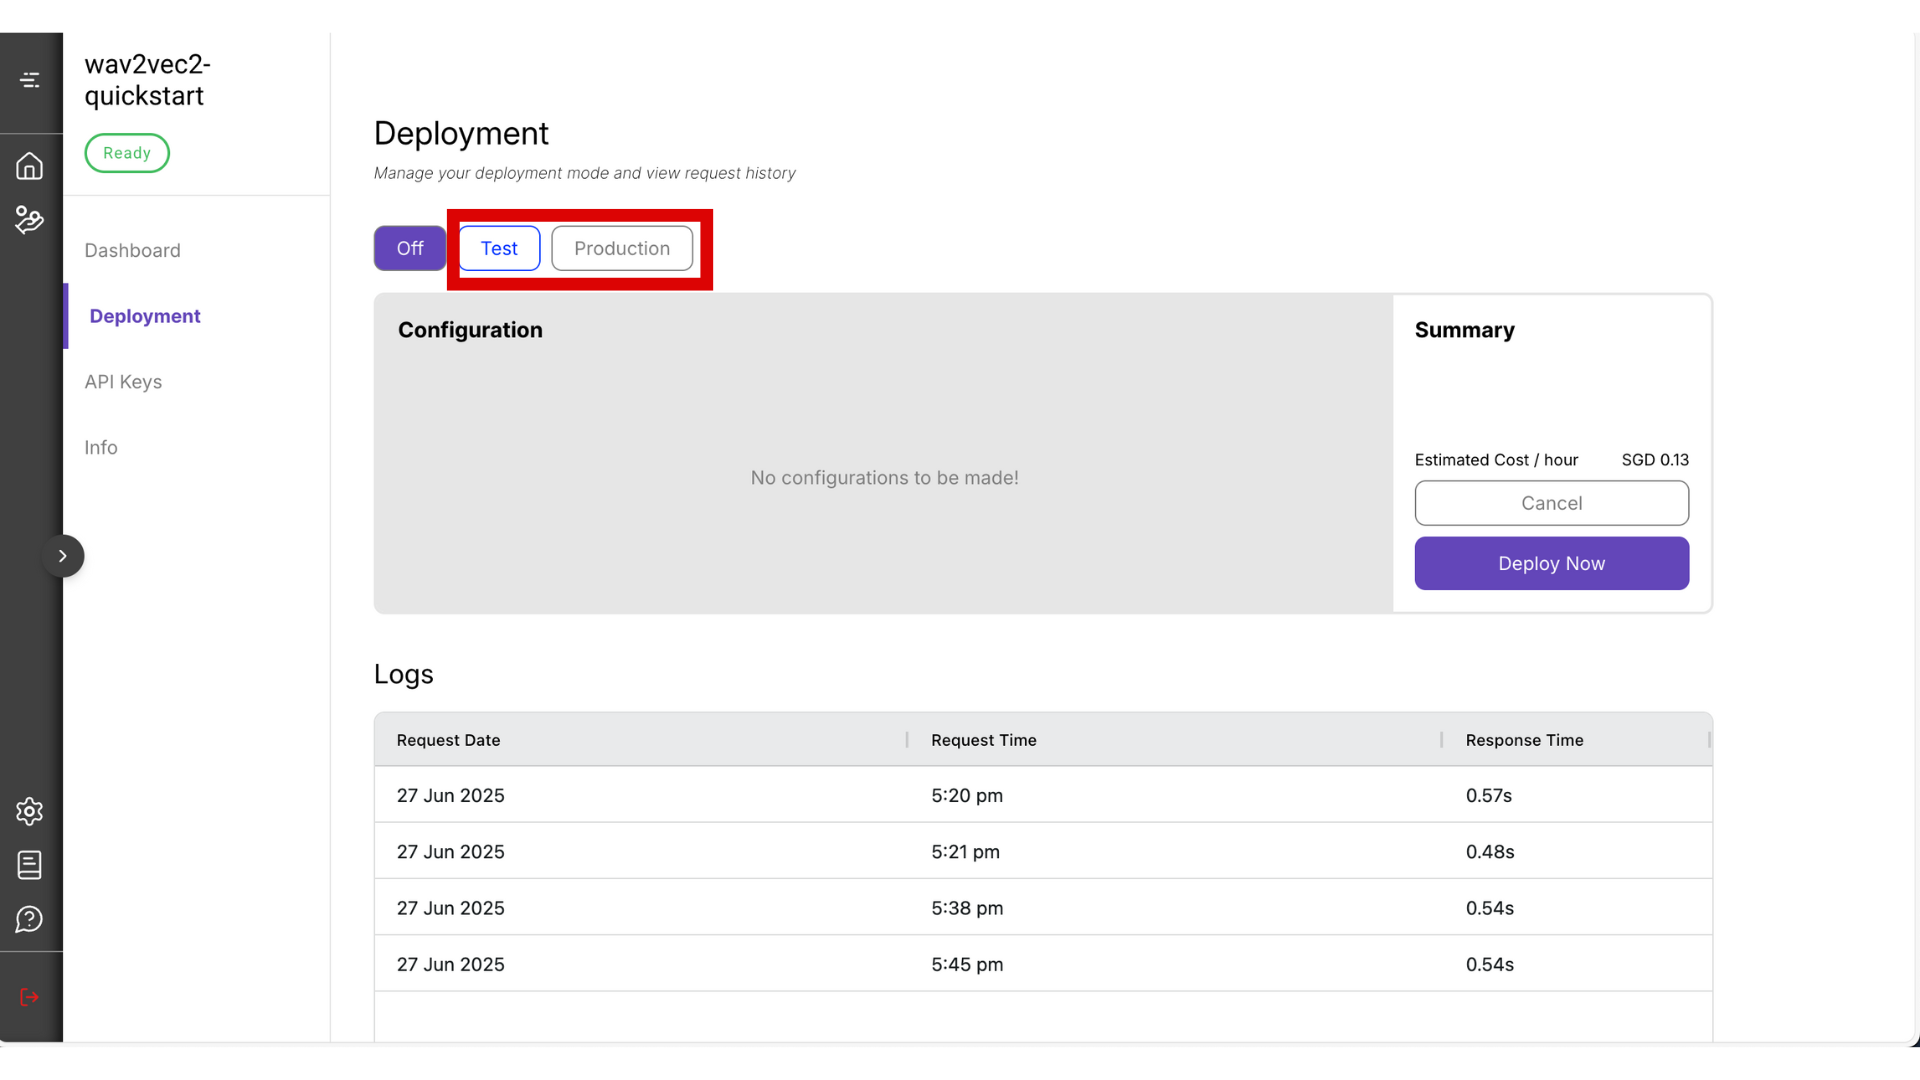
⚠️ Warning: Be sure to manually turn it off by clicking the Off button when you’re not using it, to avoid unnecessary charges.
-
The deployment process may take around 10 minutes. Once it’s ready, copy the Endpoint URL and Project ID that will be visible from this page.
-
It may take about 10 minutes to get your deployment ready. After that, copy your endpoint URL from this page
-
Navigate to the API Keys section.
- Set a name (for your own reference), and choose a validity period. Then click Create Key
- After the key is generated, copy and store it somewhere safe — you won’t be able to view it again from the platform.
⚠️ Warning: Never store your API key in public locations (like GitHub repositories). If exposed, malicious users could access your API and incur charges on your behalf.
✅ Final Step: Call the API
Load & preprocess a single image
from datasets import load_dataset
from torchvision import transforms
import matplotlib.pyplot as plt

# Load CIFAR-10 dataset from Hugging Face
dataset = load_dataset("cifar10")

# Define transform: to tensor + normalize
transform = transforms.Compose([
   transforms.ToTensor(),
   transforms.Normalize((0.5,0.5,0.5), (0.5,0.5,0.5))
])

# Get first image and label
img = dataset['train'][0]['img']
expected_label = dataset['train'][0]['label']

# Show original image
plt.imshow(img)
plt.title(f"Label: {expected_label}")
plt.axis('off')
plt.show()

# Preprocess the image
img_tensor = transform(img)
print("Tensor shape:", img_tensor.shape)
print("Tensor values:", img_tensor)
Send it to the inference endpoint:
Send it to the inference endpoint
Make sure to fill in the details based on your project in the Hyperpod AI User Interface.
import httpx
import numpy as np

# Fill in based on your project
endpoint_url = ""
project_id = ""
api_key = ""

# Add the batch dimension
arr_batch = np.expand_dims(img_tensor.numpy(), axis=0)

client = httpx.Client(http2=True, timeout=httpx.Timeout(30.0))
response = client.post(endpoint_url,
 headers={
     'content-type': 'application/json',
     'x-api-key': api_key
 }, json = {
     'project_id': project_id,
     'grpc_data': {'array': arr_batch.tolist()}
 })

print(response.text)
predicted = response.json()["array"][0] # use your label dictionary to identify what this label is
print("Predicted Label:", predicted.index(max(predicted))) # Check this against the predicted label
Didn't get the predicted label?
Don't worry this has nothing to do with your deployment but the training. Feel free to tune the hyperparameters of the model and try to get a value that has the lowest Cross Entropy Loss